How to build a Gabion fence?

Gabion fence is the forenamed cage that can be filled with any rock material, for instance, split sandstone, field stones, limestone, granite cubes, and even brick remnants, colored concrete and recycled glass. Gabion fencing authorizes you to activate the flow of imagination and built a unique structure.
Table of Contents
Steps in installation of Gabion fence
Step 1: Placing out the site
Begin by laying out the wall applying a string line and line level or a carpenter’s level mounted on a long straight edge (generally 2″x4″ – 12′ long) and confirm that the pad is equalized in both directions.
Step 2: Provide a firm and legal base
Applying a hoe or flat shovel, remove any grass, weeds, or topsoil. In case the soil is hard, you may be able to place your gabion wall directly on the existing soil. In case you have sandy or clay soil, you will require to replace about 6″ depth with solid gravel or a concrete footer, otherwise, the soil might slump under the weight.
Step 3: Gabion Support – Introduce support columns
There is practically no structural integrity in the wire of a narrow-width gabion wall. These walls will require enclosed support posts embedded in concrete and spaced on approximately 6′ centers.
Based upon the installation and local codes, general columns may be sections of galvanized pipe, pressure-treated wood posts, or structural steel members.
Make sure to bury the column 3-4′ deep, attach dry mix concrete, then wet it up and return in a day or two and begin your installation.
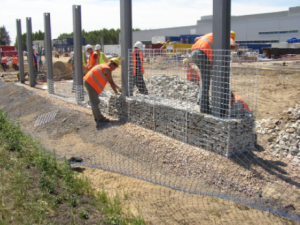
Step 4: Assembling the Gabion Baskets
Begin by buildup and laying out the wire mesh panels with their bottom panel laying flat on the arranged base by sliding the gabion over the enclosed support posts. Gabion baskets are held collectively with a spiral of galvanized steel that you wind through the adjacent edges of the mesh panels. It’s simple to do since the spiral matches the gabion’s mesh grid spacing.
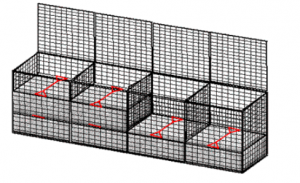
6 ft. long baskets are the most typically used size. They have a middle dividing panel to decrease bulging, which is wired in along its bottom edge while the cage is open on the flat area and further down every vertical side once the sides are built up and the basket is in place.
Step 5: Filling the Gabion Baskets
In case you have indigenous rocks available, filling with these on-site materials will create a gabion wall that fits well into its surrounding landscape.
To prevent overflow, the exterior rocks placed opposite the exposed faces need to be slightly larger than the mesh openings. The usual 3″ x 3″ mesh needs a minimum of 4″ rocks and limits the largest rock to 8″. Apply angular rocks to fit into corners and smaller rocks or utilized bricks and concrete materials may be inserted in the center of the structure as they will not be checked when finished.
Step 6: Adding Layers
To access fence heights taller than 3′ you usually stack multiple baskets on top of each other. Previously you have packed the lower basket; the wire closes its lid and then compiles the second layer on top. Fill the second layer like the first applying the best-looking rocks on the face and the less attract
FAQs
What are the benefits of using gabion boxes?
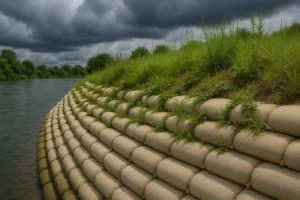
Gabion boxes offer advantages such as erosion control, slope stabilization, flood management, aesthetic appeal, and ease of installation.
What materials are commonly used to fill gabion boxes?
Gabion boxes can be filled with a variety of materials, including crushed stone, gravel, rock, or recycled concrete.
Are gabion boxes environmentally friendly?
Yes, gabion boxes are environmentally friendly as they allow for natural drainage, promote vegetation growth, and are made from recyclable materials.
Ocean Non Wovens Pvt. Ltd
India’s Leading Manufacturer, Supplier & Exporter of Geomembranes & Geosynthetics
RR-24, 2nd floor, Rohtak Rd, Mianwali Nagar, New Delhi, 110087
Tel: +91 8447226007 | Email: sales@oceangeosynthetics.com
source on Google
 Flood Control with Geobags: A Sustainable and Effective Approach
Geogrids, Geosynthetics, Insights
Geosynthetics in Construction of Roads Subgrade Stabilization with Geogrids Turnkey Sports Project – Dehradun Case Study